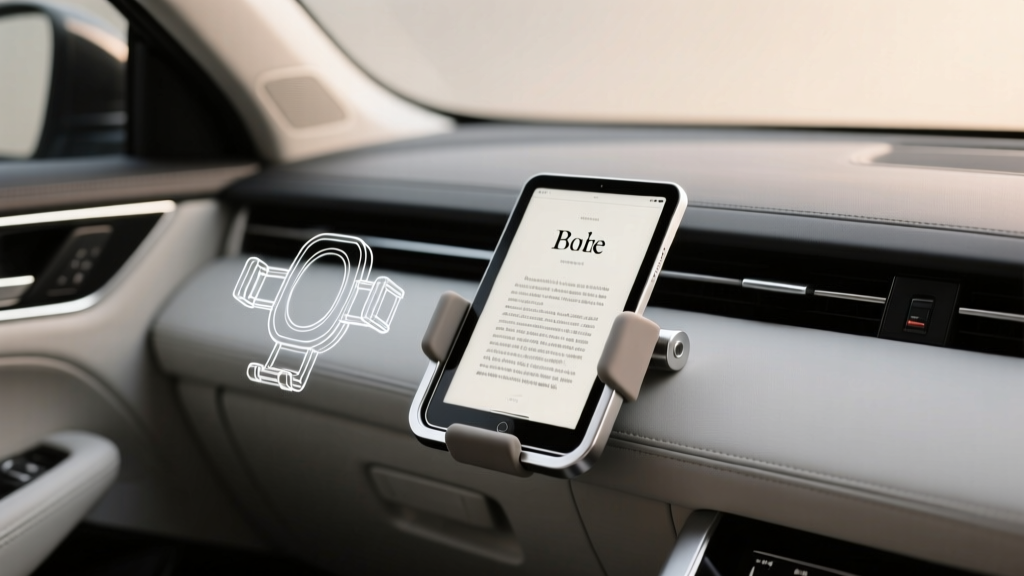
E-Reader Holder Customization: CarInteriorMix (2026)
If you?ve ever tried reading a Kindle, Kobo, or Nook in the car, you already know the frustration: glare from the windshield, a mount that wobbles over bumps, or a ?universal? holder that never feels truly secure. Whether you read while parked, travel as a passenger, or set up a back-seat reading station for kids and teens, a well-built e-reader holder can make your car feel more like a comfortable lounge than a cramped cabin.
Customization is where things get interesting. The difference between a basic clamp and a dialed-in setup comes down to small details?mount geometry, vibration control, cable routing, glare management, and interior-safe attachment methods. Done right, you get a stable, ergonomic, and safe e-reader mount that looks factory-clean and doesn?t chew up your dashboard trim.
This guide breaks down advanced customization techniques you can apply to most vehicles and most e-readers. You?ll find step-by-step instructions, real-world examples, product comparisons, and the most common mistakes that cause rattles, droop, and interior damage.
Plan Your Setup Like a Pro: Use Case, Location, and Safety
Start with the use case
- Driver (parked only): Focus on quick-release, minimal footprint, and glare control. Never mount in a way that blocks your view or encourages reading while driving.
- Front passenger: Prioritize adjustability (tilt + swivel), stable arm length, and comfortable reach.
- Rear passenger / family car: Aim for seat-back mounting, tamper resistance, and durable materials that handle repeated adjustment.
Choose a safe mounting zone
- Avoid airbag deployment paths: This includes passenger dash airbags, side curtain airbags, and seat-mounted airbags.
- Keep the windshield clear: Many regions restrict windshield mounts; even where allowed, keep it low and out of sightlines.
- Minimize distraction: If the e-reader is visible to the driver, mount it lower and angled away.
Measure before you buy or build
- E-reader width/height (with any case installed)
- Port location (USB-C, Micro-USB) for charging clearance
- Target viewing distance (typically 16?26 inches for front passenger comfort)
- Trim material (soft-touch, textured plastic, leatherette) to choose safe adhesives/pads
Pick Your Mount Base: Best Platforms for Customization
Advanced customization starts with a solid ?base.? From there, you can upgrade clamps, arms, and joints.
Headrest mount systems (best for rear passengers)
Why it works: Extremely stable, doesn?t touch the dashboard, and keeps the screen out of the driver?s view.
- Pros: Great vibration control, clean cable routing down the seat, kid-friendly placement
- Cons: Not ideal for the front passenger; requires compatible headrest posts
Seat-rail / floor mounts (best for front passenger ?reading lounge?)
Why it works: Strong mechanical anchor point, long reach without shaking when you brace correctly.
- Pros: Most stable for larger e-readers; doesn?t mark trim
- Cons: Takes time to install; can interfere with seat travel if poorly planned
Vent mounts (best for light e-readers and temporary setups)
Why it works: Quick install and easy to remove.
- Pros: Convenient, low visual clutter
- Cons: Can sag; blocks airflow; not ideal for heavy devices or rough roads
Dash/windshield suction mounts (best when you need maximum adjustability)
Why it works: Huge range of angles and placement options.
- Pros: Highly adjustable; good for parked reading
- Cons: Can fail in heat/cold; may leave rings; legal restrictions in some areas
Advanced Customization Technique #1: Upgrade the Connection Standard (Ball, AMPS, or Modular Arms)
Many ?e-reader holders? fail because the joint between the base and the cradle is weak. Upgrading that connection often fixes 80% of wobble.
What to look for
- 17mm ball: Common and inexpensive, but quality varies.
- 25mm ball: More surface area and grip?better for heavier devices.
- AMPS pattern (4-hole): A semi-standard mounting plate used in commercial mounts; extremely secure.
- Modular arm systems: Let you mix base + arm + cradle across brands.
Step-by-step: Convert a basic cradle to an AMPS or ball mount
- Remove the cradle?s factory clip: Many cradles use two screws or a snap plate.
- Check for a flat mounting face: If uneven, add a thin rubber pad to level it.
- Choose a conversion plate: Use a ball-to-AMPS adapter or an AMPS-to-ball adapter depending on your base.
- Use threadlocker sparingly: A small drop of blue threadlocker helps keep screws from backing out due to vibration.
- Test for tilt creep: Tighten the joint, then press on the top of the e-reader. If it slowly droops, the joint is undersized or the pad surface is too slick.
Real-world example: A rear headrest setup that shakes on rough roads usually isn?t the headrest bar?it?s the tiny ball joint at the cradle. Moving from a small ball joint to a larger ball or AMPS plate typically makes the screen stop ?bouncing? when the car hits expansion joints.
Advanced Customization Technique #2: Vibration Damping and Anti-Rattle Tuning
Cars vibrate in multiple directions, and e-readers are light enough to amplify that motion. The goal is to remove play (tiny gaps) and damp what remains.
Materials that work well in car interiors
- EPDM or silicone rubber shims: Heat-resistant and won?t get gummy in summer.
- Felt tape: Great for anti-rattle where plastic contacts plastic.
- Closed-cell foam pads: Useful behind a cradle face, but avoid thick foam that ?springs? and bounces.
Step-by-step: Eliminate wobble in a clamp-style holder
- Find the play points: Hold the mount arm steady and wiggle the e-reader. Note where movement happens (cradle jaws, ball joint, arm hinge, base attachment).
- Shim the jaws: Add thin rubber strips to the clamp faces so the e-reader is gripped firmly without over-tightening.
- Pad hard stops: If your holder has plastic ?corners,? add felt tape to reduce tapping noises.
- Tighten and re-test: Adjust in small increments. Over-tightening can crack plastic or deform the cradle over time.
Advanced Customization Technique #3: Glare Control and Night Comfort
E-ink screens handle sunlight better than phones, but glare still happens in a car due to steep windshield angles and side windows. Customizing for glare can make reading more relaxing, especially while parked.
Practical glare fixes
- Angle first, brightness second: Rotate the mount so reflections move off-screen.
- Add a matte screen protector: Great for reducing specular reflections; choose a quality option to avoid ?sparkle? texture.
- Use a small visor or hood: A thin, soft-touch shade (even a simple DIY foam hood) can block high-angle sun.
- Night reading: Warm front-light settings reduce eye fatigue. Keep brightness just high enough to read without lighting up the cabin.
Tip: If your e-reader has physical page-turn buttons, mount it so your dominant hand can reach them without twisting your wrist. Comfort beats fancy angles.
Advanced Customization Technique #4: Clean Cable Routing and Power Options
A dangling cable turns a tidy interior into a mess?and it can become a snag hazard. A clean power plan also keeps your device topped up for long trips.
Step-by-step: Route a charging cable like OEM
- Pick the right cable length: Too long creates loops; too short stresses the connector. For most front setups, 3?6 feet is the sweet spot.
- Use a right-angle connector if needed: Helpful when the port faces toward the cradle or a trim panel.
- Follow existing panel gaps: Tuck the cable along console seams and seat edges rather than crossing open areas.
- Secure with interior-safe clips: Use removable adhesive cable clips rated for automotive temperatures.
- Add strain relief: Leave a small service loop near the e-reader so moving the mount doesn?t tug the port.
Power recommendations
- Dual-port USB-C car charger (30?45W): Plenty for an e-reader plus another device.
- Low-profile charger: Keeps the center console clean and avoids knee bumps.
- Optional: A 12V outlet splitter if your vehicle has limited ports (but avoid cheap splitters that wiggle and lose contact).
Advanced Customization Technique #5: Interior-Safe Attachment (No Damage, No Residue)
Custom mounts often fail because the attachment method wasn?t chosen for the surface. Soft-touch dashboards, textured plastics, and leatherette all behave differently under heat.
Best practices
- Use removable, automotive-rated adhesives: Look for high-temp ratings to reduce summer failures.
- Protect trim with a sacrificial layer: A thin rubber pad or film between mount and trim helps prevent ?ghosting? and scuffs.
- Avoid superglue and permanent epoxy: They can permanently stain or melt plastics.
- Clean surfaces correctly: Use isopropyl alcohol on hard plastics (test a hidden spot first). Avoid harsh solvents on soft-touch coatings.
Product Comparisons: What?s Worth Buying vs. Modifying
You don?t always need a fully custom build. Sometimes a good base product plus a few upgrades is the smartest route.
Clamp cradle vs. case-specific cradle
- Clamp cradle: Flexible for different devices, but may require shims to stop wobble.
- Case-specific cradle: Usually more stable and quicker to dock/undock, but you?re locked into that device/case combo.
Magnetic mounts (use cautiously with e-readers)
- Pros: Fast docking, minimal bulk.
- Cons: Requires adding a metal plate; may not hold well through thick cases; not ideal for bumpy roads unless the magnet system is strong and well-designed.
Best ?upgrade-friendly? features to shop for
- Modular joints (ball or AMPS) rather than proprietary snap-only connectors
- Metal-reinforced hinges in long arms
- Replaceable pads/grip surfaces on clamps
- Tool-adjustable tension knobs instead of tiny plastic thumb wheels
Common Mistakes to Avoid
- Mounting in an airbag zone: Even a lightweight e-reader can become a projectile if an airbag deploys.
- Over-tightening clamps: Cracks cradles, warps cases, and can damage the e-reader frame over time.
- Ignoring heat: Suction cups and cheap adhesives fail in hot cabins. Choose automotive-rated materials.
- Placing the screen where the driver can see it: It?s a distraction risk, even if you ?only read at stops.?
- Letting cables dangle: Snag hazards and premature port wear from repeated tugging.
- Using soft foam as a ?fix? for wobble: Too much compressible foam can create a spring effect that increases bounce.
FAQ: Advanced E-Reader Holder Customization
What?s the most stable mount type for an e-reader in a car?
For rear passengers, headrest post mounts are typically the most stable. For the front passenger, a seat-rail/floor mount is hard to beat because it uses a solid mechanical anchor rather than trim or vents.
Can I use a phone mount for a Kindle or Kobo?
Sometimes, but many phone mounts are designed for smaller, heavier devices and can struggle with the wider footprint of an e-reader. If you try it, upgrade the joint (larger ball or sturdier arm) and add rubber shims so the clamp grips evenly.
Will a mount damage my dashboard or vents?
It can if the attachment method doesn?t match the surface. Use interior-safe pads, avoid permanent adhesives, and don?t overload vent slats with heavy devices. If you want a no-risk option, choose headrest or seat-rail mounting.
How do I stop the holder from drooping over time?
Droop usually comes from an undersized ball joint, a slick contact surface, or a hinge that?s worn in. Increase friction with a rubber washer/shim, tighten with the correct tool, and consider moving to a larger ball joint or AMPS plate if the device is on a long arm.
Is it safe to read in the car with an e-reader mounted up front?
It?s safe when the vehicle is parked and the mount doesn?t interfere with airbags or visibility. For travel reading, front passenger or rear-seat setups are best. The driver should never read while driving.
Next Steps: Build a Cleaner, More Comfortable Reading Setup
Start by picking the right base (headrest for rear passengers, seat-rail for front comfort, vent/dash only if you accept the trade-offs). Then upgrade the weak link?usually the joint?before you chase minor tweaks. Finish with vibration tuning, glare management, and tidy cable routing so the final setup feels intentional, not improvised.
If you want a simple weekend project, do this order:
- Relocate the mount to a safer, more stable zone
- Add shims/pads to eliminate rattle
- Upgrade to a stronger joint standard (larger ball or AMPS)
- Clean up charging with routed cable + strain relief
For more practical car interior tips, mounting guides, and comfort-focused upgrades, explore the latest articles on carinteriormix.com.